Showing posts with label p2. Show all posts

Collective NOTD Post

Hi everyone,
I have a few nail polishes I want to show you that I wore lately :) I just didn't have the time to post them all separately, so I put them into one post. Hope you don't mind! Tell me if you want a review for a certain color, because I will now just tell you the names and show you the pics :) I will link posts where I already swatched them and talked about the colors in detail.
Here you go:
- China Glaze - Knotty *click*

- China Glaze - Sea Spray *click*

- OPI - Suzi Says Feng Shui *click*

- Catrice Floralista LE - C01 Pink Spring *click* with p2 crackling top coat in black *click* over it

- Catrice Urban Baroque LE - C02 Rock Barock *click*
Do you like these colors?? And do you want my NOTD posts in the future in separate posts, or collective like this one??
xoxo, Misch Read Full...

Spotted + Haul: Current LEs: Catrice etc.

Hi there! 
I just lately saw some LEs at the drugstore, and I bought a few things. First of the ones that I didn't buy things from:
Manhattan - London Calling

Alverde - My Perfect Day

Essence - I Love Berlin

I'm not gonna say anything anymore about these, if you want to know more about them, click the names and you'll see the products on Pinkmelon.de (except for the Alverde one)!


Now the ones I bought stuff from:
p2 - Make Up Parade
A cute little LE that didn't get that many good reviews from other bloggers, and I got the only thing that really interested me: the silver glitter polish top coat. It's called 01 groovy finish and a sheer polish with glitter particles and glitter sticks that is mainly meant as a top coat. It's not really meant to be opaque. But I like it :)
p2 glitter top coat - right: china glaze - sunset sail
Catrice - Floralista (click for pics on pinkmelon)
A really nice floral-themed LE that didn't seem that interesting to me at first. But when I saw it in real life, I liked it a lot :) It contained a lot of pretty stuff, and if I had more money I'd gotten more stuff ;) Take a look at it, it's pretty :) I got 2 polishes and the blush.
The blush 01 As Lively As Ever contains two colors, a coral and a pink. 
The design is really cute with the flowers :) The colors are matte and pretty bright. The blush is pretty pigmented, but you can apply it naturally. I can't really say that the colors are big enough to use them separately, but that depends on which brush you use. I prefer to use them mixed together, as one coral pink color. It lasts pretty long, but fades a little during the day.
The nail polishes I bought are in the colors C01 Pink Spring and C03 lavender breeze.
left: C01; right: C03
CO1 is a pretty bright pinkish purple shade, I like it a lot :) 
it's too pale in this pic :P
this pic shows the color perfectly
It's a nice spring color to me, and I immediately have to wear it! It's opaque with two coats, really cool. It's a creme polish, and not really that unique, but I still like it a lot! Weirdly enough, I didn't own a color like this before. Why?? I have no idea, it's pretty <3
C03 is a light light light pale lavender color that looks mainly white in the bottle.

to see the difference: above a true white (Essence Stampy Polish) and underneath Catrice - C03. You can tell the light lavender hint!
It's a creme polish, and surprisingly opaque with 2 coats. I expected it to be way more sheer because it's such a pale color, but it's pretty opaque! I like the color, because a polish that is that pale is not very common. You can mainly tell the lavender hint in it by comparing the polish to a true white.  


I like these things a lot :) What did you get from these LEs??
xoxo, Misch

Read Full...

Valentine's Series: Nail Art #4

Hey there!
This is my last Nail Art Design for Valentine's Day, and again, it's on a nail wheel.
Here we go:
That's what you need:
- a base coat of you choice (I used Essence pro white french)
- a bright red color (I used p2 it's hot)
- a black creme polish (I used p2 eternal)
- a white tip painter (I used essence white tip painter)
- your favorite top coat (I used Essence nail art sealing top coat

That's how to do it:
1.  Use your base coat to protect your natural nails.
2. Paint all of your nails red, use as many coats as needed.
3. Add a black line over your tips, just as if you were doing a straight french tip manicure.
4. Separate the black and the red color by drawing a thin white line in between. Use either a tip painter or pour some white polish onto a piece of paper, pick it up with a toothpick and use that to create the thin line.
5. Seal the design with your favorite top coat.

This design was inspired by this look from the illamasqua throb collection *click*. In the collection the tips are white and the separation line is black, but I liked it better the other way round. Which one do you prefer?
xoxo, Misch
Read Full...

Valentine's Series: Nail Art #3

Hey dear readers,
today's post is another nail art for Valentine's Day. Again, I did it on a nail wheel, didn't have enough time for a full manicure.
Let's get started, shall we?

That's what you need:
- a base coat of you choice (I used Essence pro white french)
- a bright red (I used p2 it's hot)
- an opaque white polish (I used Essence Stampy Polish in white)
- a toothpick or other tool to draw with
- a pink polish (I used Hot Stuff by Essence)
- a top coat of your choice (I used Essence Nail Art Sealing Top Coat)

That's how to do it:
1. Use your base coat to protect your natural nails.
2. Paint all your nails with the red polish.
3. Take your white polish and draw a diagonal line over your nail.
4. Pour some of the white polish onto a piece of paper and pick it up with your toothpick or other tool. Then draw some tiny hoops along the outer lines or the diagonal stripe we just did. This is going to look like lace when it's finished, so just draw them on both sides all the ways down. You'll see what I mean in the pictures.

5. Pour some of the pink polish onto your piece of paper and pick it up with your tool. Now we're gonna write "xoxo" onto the middle white part. Do it very carefully and don't make it too hard. Just create it by doing lines and circles.
6. Seal your design with your favorite top coat.

And that's it! Easy, but really cute! What do you think?
Bye, Misch Read Full...

Valentine's Series: Nail Art #2

Hey there,
today I have another nail art piece for Valentine's Day. I didn't do this one on my nails, because I didn't have enough time for a full manicure, so I just did it on a nail wheel. Hope you don't mind!
The design I did is pretty simple, it just takes some concentration and you need to be careful when drawing!

That's what you need:
- a base coat of you choice (I used Essence pro white french)
- an opaque white polish (I used Essence Stampy Polish in white)
- a bright red (I used p2 it's hot)
- a toothpick or other tool to draw with
- a top coat of your choice (I used Essence Nail Art Sealing Top Coat)

That's how to do it:
1. Use your base coat to protect your natural nails.
2. Paint all your nails with the white polish.
3. Pour some of the red polish onto a piece of paper and pick it up with your toothpick or other tool. Then draw some lip-shaped kisses onto your nails. It's pretty easy, just do a dew trials ahead of time, and then draw them carefully. For help, you can just look at a few pictures, like this one *click* Do as many kisses as you like, and make them as big or small as you like! :)
4. Seal your design with your favorite top coat.

I really like this design, it's easy but pretty, and it totally matched the whole Valentine's Day scheme. Do you like it??
xoxo, Misch


Read Full...

Valentine's Series: EOTD #1

Hi there!
This is my first Valentine's Day eye look :) It's a pink look with a little bit of brown. When you do pink looks, keep in mind that it can make you look tired and crying easily, so don't overdo it.
That's what you need: 
- an eyeshadow base of your choice (I used the one by RdLY)
- a bright pink eyeshadow (I used one from an old duo by Essence, it was LE)
- a light shimmery pink color (I used a discontinued eyeshadown by the Manhattan MyBox Series)
- a cranberry eyeshadow (I used Spiced Red by Catrice from the Carame LE; it's a dupe for MAC cranberry)
- a shimmery brown color (I used the one from the mocca beige duo by RdL)
- a champagne color (I used the one from the mocca beige duo by RdL)
- a brown pencil liner (I used the p2 perfect look kajal in brown)
- black mascara (I used the diamond wish one by RdLY)

That's how to do it:
1. Apply an eyeshadow base of your choice all over your lid to prevent creasing.
2. Add the bright pink color to the center of your lid.
3. Apply your light pink shimmer color to the inner thrid of your lid.
4. Now slightly apply the cranberry color onto your v-area. You don't want to make it too vibrant, it should just give a nice red undertone for the following color.
5. Pick up your brown shimmery color and apply it to your crease. It should go over the cranberry color. Blend it out towards your brow. Also add a tiny bit of this color on the outer third of your lower lashline.
6. Add the champagne color to your brow bone and your inner corner to brighten your eye.
7. Line your top lashline and 2 thirds of your waterline with the brown eyepencil.
8. Add mascara to both your top and bottom lashes.

And that's it! I like it, because it uses pink, the go-to valentine color, but still doesn't make you look weird. What are you gonna wear on Valentine's Day?? I'll do some more looks, so you'll get inspired ;)
xoxo, Misch Read Full...

Valentine's Series: Nail Art #1: Hearts

Hey everyone,
as I did an EOTD series for Halloween and then a NOTD series for Christmas, I'm gonna do one for Valentine's Day :) I'll be doing not only one category, there'll be some EOTDs and NOTDs for sure!
Tell me if you want a certain design or anything!

Today I did a really cute nail design with hearts that is kinda ordinary for Valentine's Day, but I still liked to do it! To some of you it might be too cute, but you don't have to do it ;)

That's what you need:
- your favorite base coat (mine is Essence pro white french)
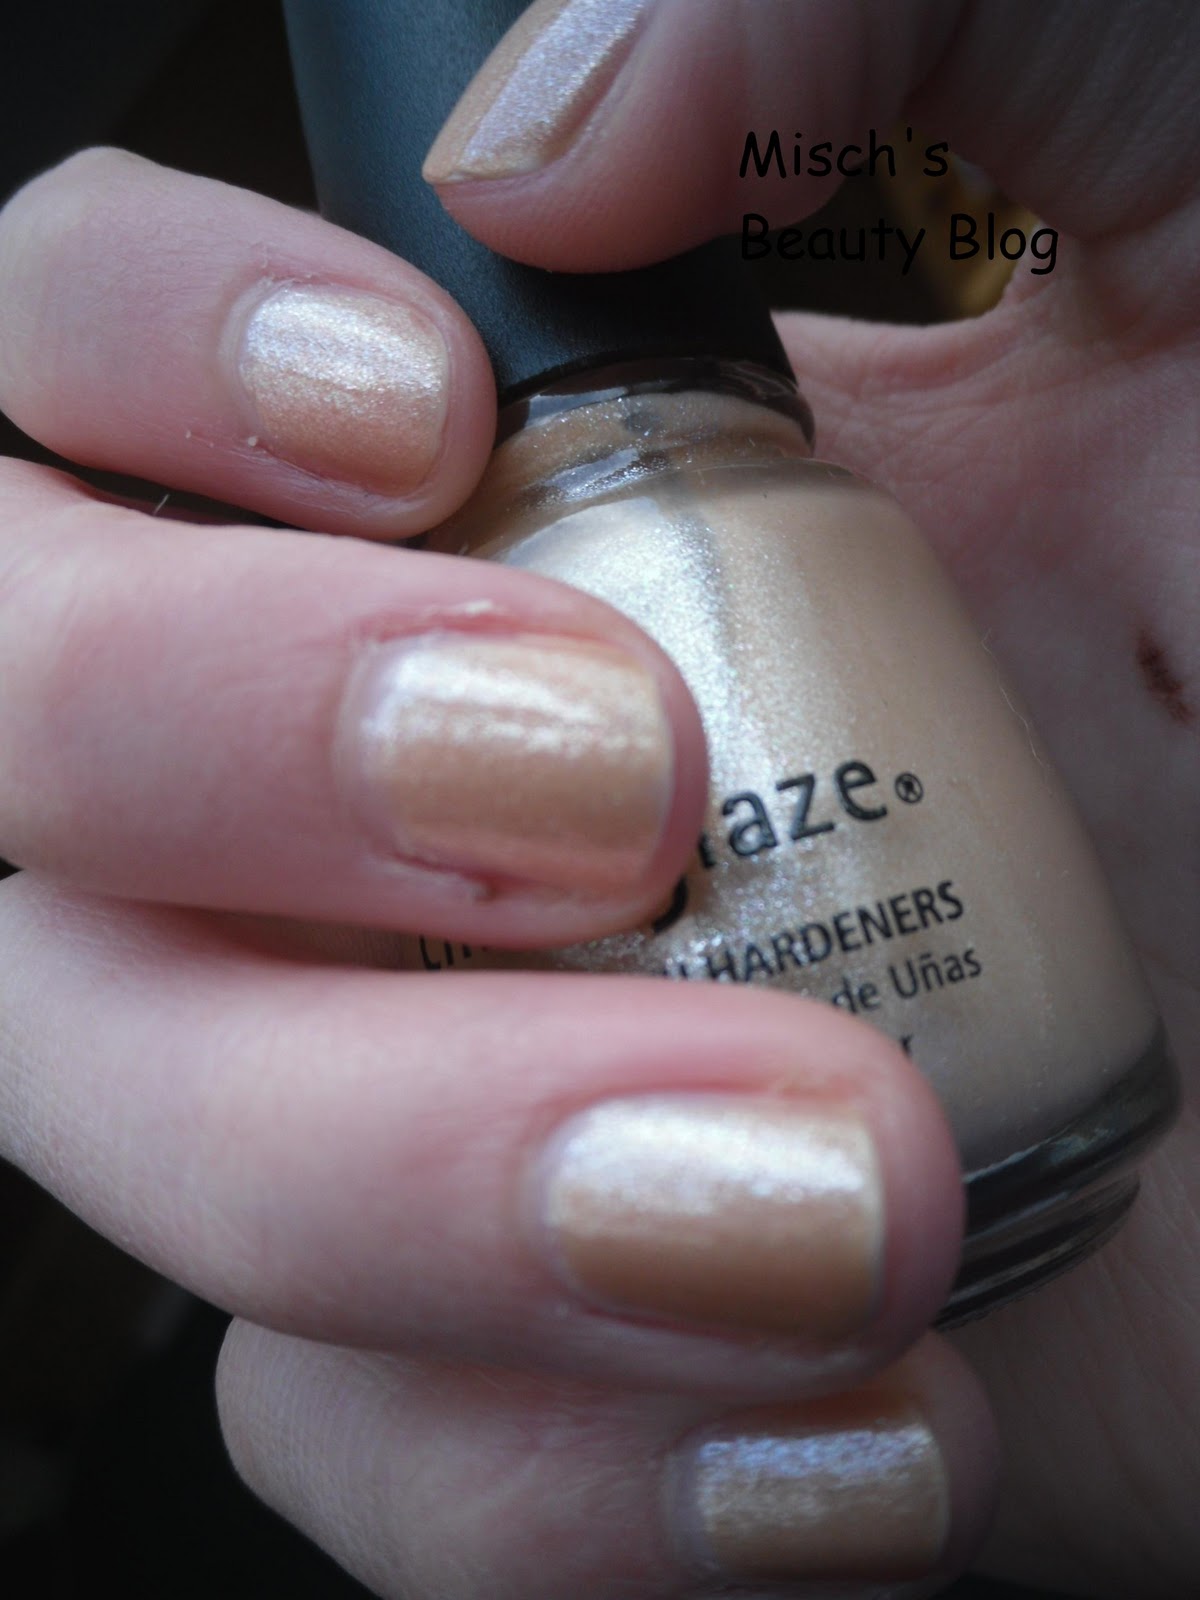
- a nude peach shimmer base color (I used China Glaze - Sunset Sail)
- a black nail polish (I used p2 eternal)
- a toothpick or any other tool (I used the Essence nail art stylist)
- a multi-color glitter polish (I used one by Essence, don't know the name, sorry)
- your favorite top coat (I used Essence Nail Art Sealing Top Coat)

That's how to do it:
1. Apply your base coat all over your nails to protect your natural nails.
2. Paint your nails with your nude peach color, use as many coats as needed.
3. Pour some black polish onto a piece of paper and pick it up with your tool/toothpick. Draw some hearts onto your nails. You decide how big they are, if you fill them in or not, how many you put onto one nail - just how you like it to be! :)

4. Add your glitter top coat if you want to, but this step is optional, of course!

5. Add your clear top coat to seal the design.

Btw, this is the China Glaze Polish on it's own:
I like it a lot, it's pretty :)
And that's it! Do you like it, or is it "too cute" for your style??
I'll see you soon!
xoxo, Misch Read Full...
 
© 2010 Copyright by Beauty Nail Art